
(updated 08/02/16)
|
(updated 08/02/16) |
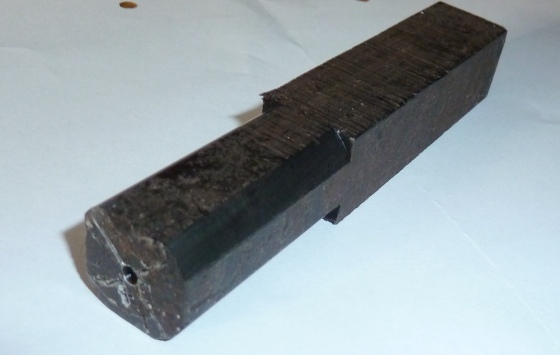
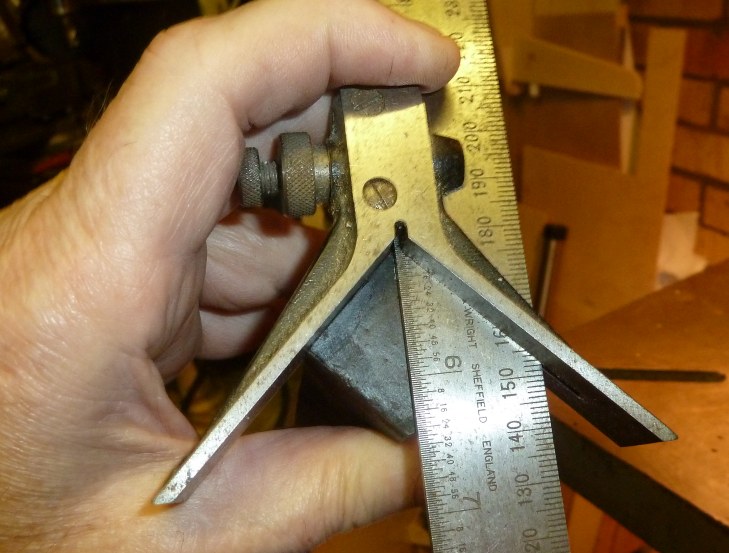 The centre of the blank is scribed using a combination centre as shown. |
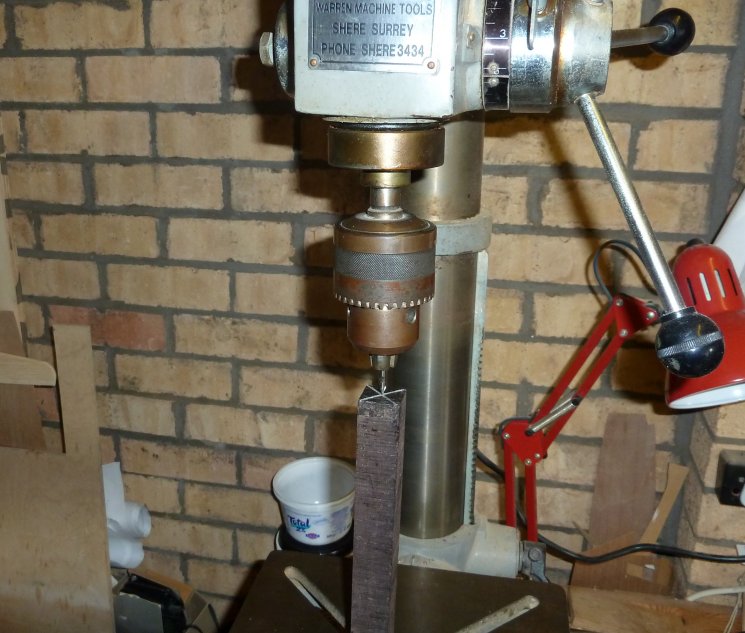 The blank is centre drilled in a pillar drill both ends after centre punching the intersection of the scribed lines |
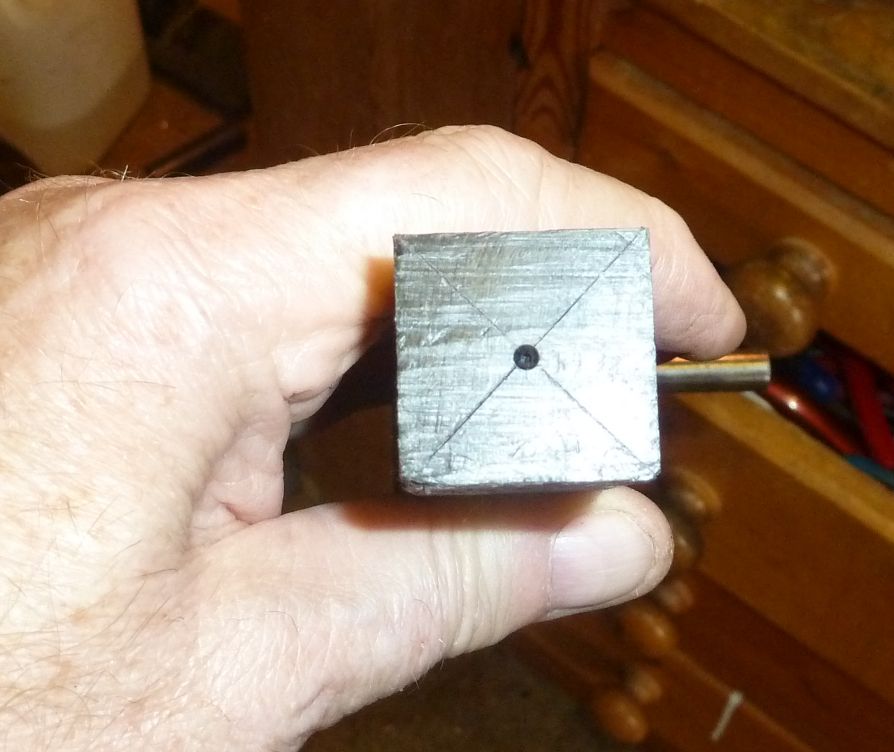 The centre drill should be exactly centred on the intersection of the 2 scribed lines both ends. |
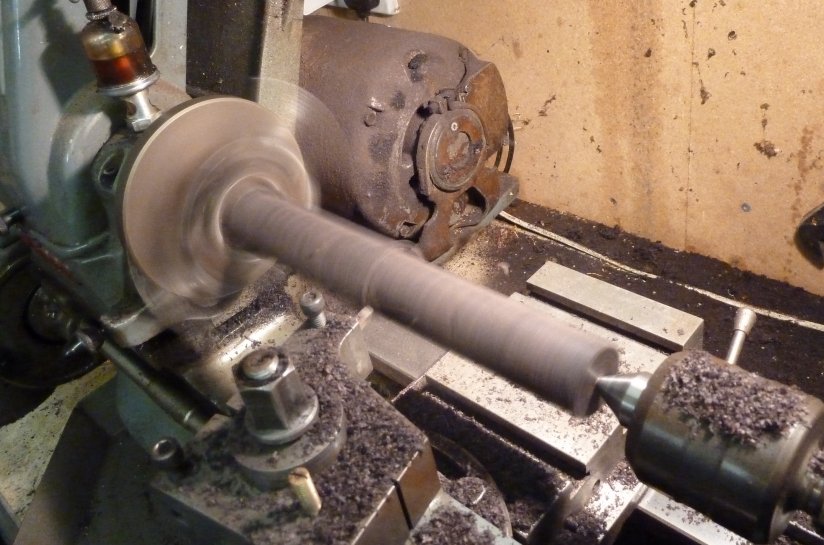
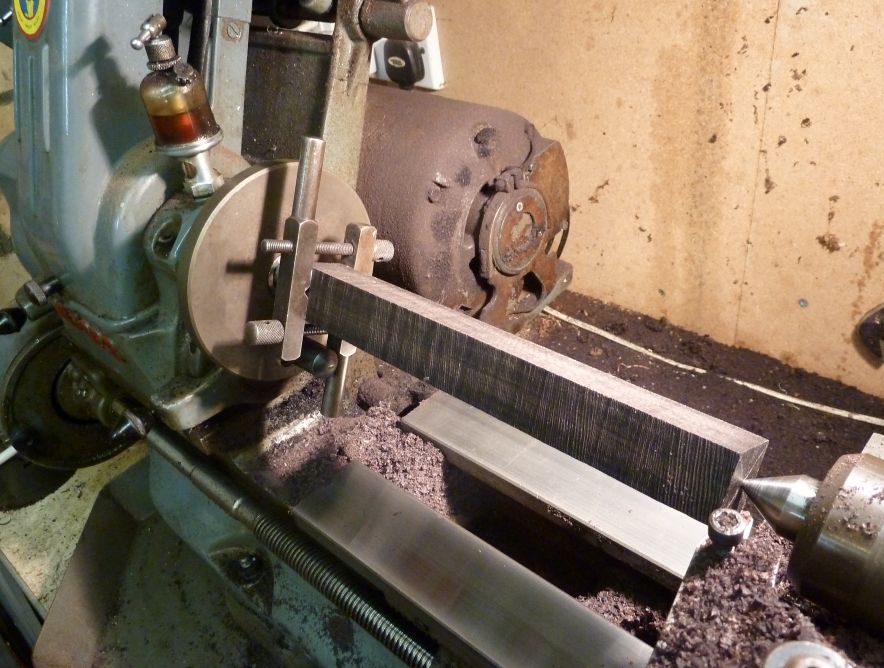 The blank is set up between centres on the lathe ready for the first turning operation |
 The blank is turned enough to make accurate mounting in the self-centering 4 jaw chuck easy |
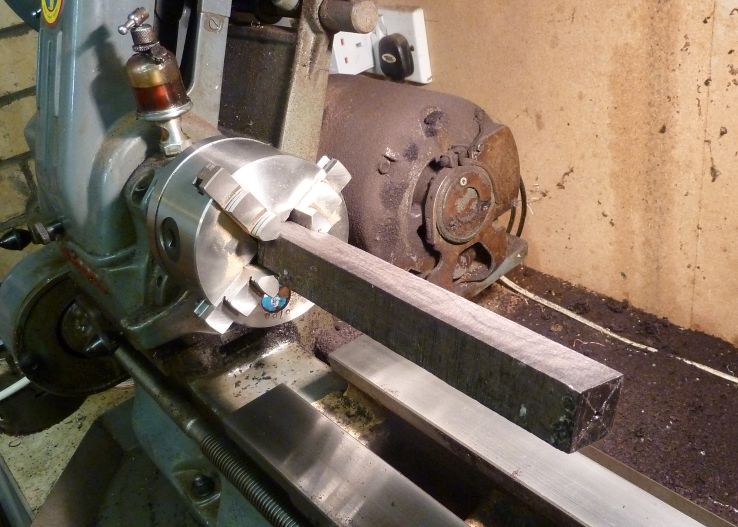 The blank is mounted in the 4 jaw chuck and checked to ensure it is running perfectly true. |
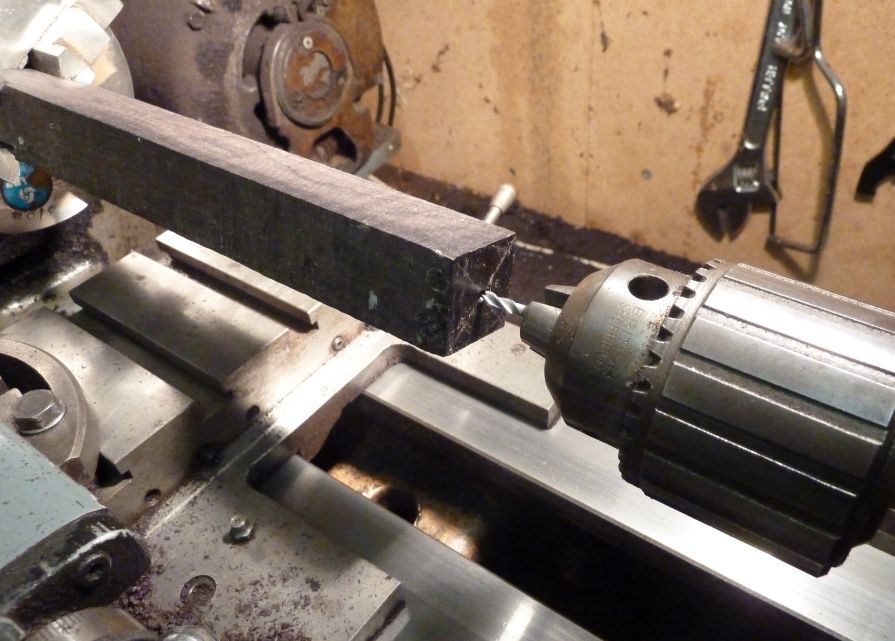 The starting hole is machined with a slot drill of the appropriate size - this must be perfectly centred!! |
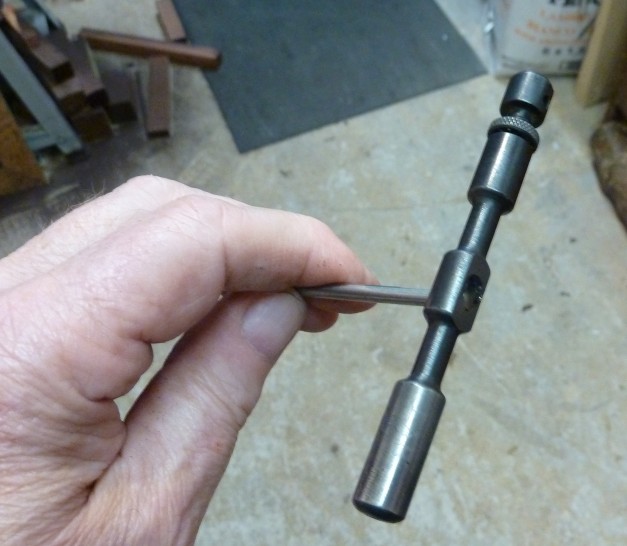 The "D"bit drill is held in a tap wrench to make the insertion and control easy. |
 The tailstock has been removed and the drill can be entered into the starting hole by hand. |
 Once the chanter is drilled it can be mounted between centres and turned to a full diameter. I usually leave this oversize until the bore has been reamed and I am ready to turn the chanter. |
The 'D' bit drill is held in a tap wrench and guided into the prepared hole by hand. This does does take some care to ensure that the initial accuracy is not compromised. I used to use a guide in the tailstock but I have found that this is not necessary and the process is much simplified if guiding through the tailstock is dispensed with.
Old method for reference only. If the lathe used is one of the older types of lathe with a 'through hole' tailstock, eg:- the early Myford® ML7, a bush can be put in this hole and the drill guided through this into the wood. This will make the first 50mm to 100mm easier after which the tailstock can be removed and the remaining drilling completed freehand. If the lathe used does not have a through hole, a guide can be made and fitted to the lathe bed. However, care must be taken to ensure that it can be fitted and dismounted whilst maintaining its accuracy.
The lathe should be run at about 600 R.P.M. (Note this is the max speed of my Myford ML7 so faster may be better) and the drill fed gently into the wood using only a light hand pressure. The cutting should proceed in steps of about 2 or 3mm. After each step the drill must be removed from the hole and the plug of swarf flicked off the end. The swarf should fill only about 3/4 of the space on the flat of the 'D' If the space is filled completely the amount that the drill is advanced each step should be reduced as there is a danger of the hole either being forced off-centre or a chamber being created. As the drilling proceeds the drill may start to bind in the hole. This can be eased by rubbing the drill on a block of beeswax.
If the friction becomes too great it is an indication that the hole being drilled is slightly smalled than the shank of the drill. I have had some success in relieving this by rubbing the shank of the drill with emery paper thus slightly reducing its diameter.
Another common problem is difficulty in extracting the plug of swarf. This is caused either by the swarf holding feature on the drill being too shallow to hold the plug of swarf securely, or the hole is not being advanced sufficiently at each step to create a plug packed down into the holding feature. This problem can also be caused by the drill cutting undersize causing the plug to be pulled off the drill by friction. The solution to this is to run a 'D' bit reamer the same nominal size as the drill into the hole thus increasing the bore diameter very slightly and allowing the plug easy passage out of the bore.
I aim to have a runout of less than 1mm in the length of the chanter and have often achieved half of this. I cannot stress strongly enough that the straightness of the final bore is established in the first 12mm of the drilling and time spent getting this right will be rewarded with a good bore that will make the chanter easier to tune and play. I would recommend starting the drilling with the shortest drone and progressing up through the lengths. This will allow enough practice to enable the chanter bore to be drilled with a greater degree of confidence.

© 1997 Mike Nelson