
(updated 14/09/11)
|
(updated 14/09/11) |
|  |
| | |
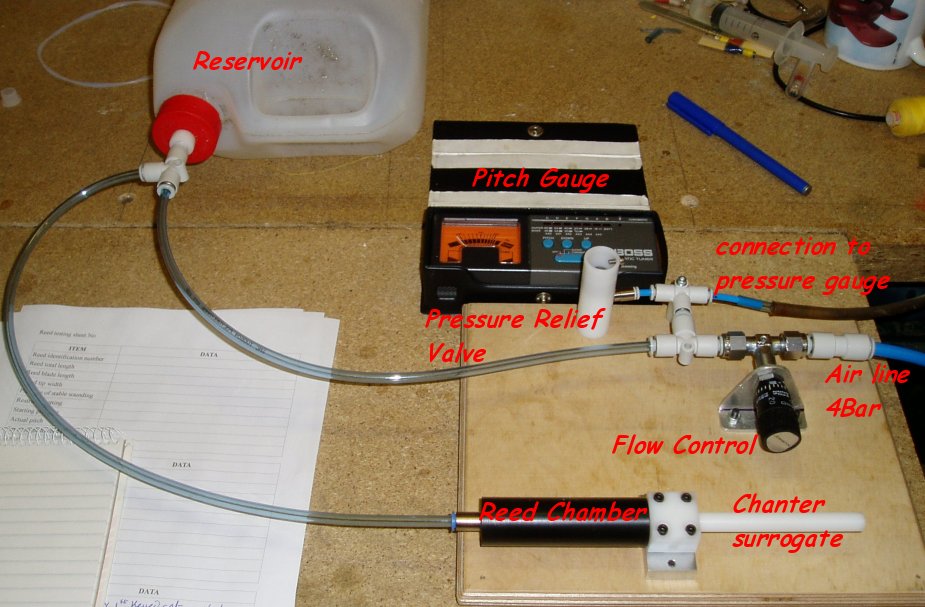
This rig will supply air at a controlled pressure and thus a controlled flow rate. One thing that it is important to understand is that it is the flow not the pressure that is the thing that makes the reed sound. The pressure in the Smallpipe bag acting on the restriction of the reed gives a flow that excites the reed and makes the sound. This rig has a high (5 bar) input pressure from my paint spraying compressor but as the air use is very low the compressor is mainly silent. The rig is very tolerant to changes in the input pressure. This input air is fed through a precision needle valve into a low pressure reservoir ( a gallon plastic container) this is to buffer the low pressure system and increase its stability. Connected to the low pressure side is a homemade pressure relief valve. This is a Ř1/2" steel ball sitting on a Ř5mm hole. In practice this relief valve has limited the pressure in the low pressure side to a maximum of 20"WG (0.722psi). The reed chamber is connected to the low pressure reservoir via a flexible tube.
The reed is fitted to a fixed block that mimics the reed socket of a normal chanter and the reed chamber pushes over it. Also fitted to this block is a tube with a Ř4.3mm diameter bore that mimics the working part of the chanter. I haven't decided if I need a set of different lengths yet or if I can learn enough from a single length. The length shown in the picture above gives a length of 160mm from the reed tip to the end of the bore. Small pitch changes can be achieved by moving the tube in and out of its socket but these changes are small. At present, from the small amount of experimenting I have done, it does look as though the tip to end length of this tube correlates well with the hole positions on a chanter.
Chanter Reeds
The parameters I am currently collecting for chanter reeds are :-
I have now been using the rig for a little while. I have set up 6 concert G chanter reeds and have been pleased with the way the resulting reeds have been able to play in tune in 6 essentially identical chanters. These chanters are all unkeyed so we have more work to do to establish parameters for keyed chanters and F chanters.
Video of the reed testing rig in use (April 2019)
I also looked into the length of the body to try to optimise it. I was aiming to get the reed playing without having to add a weight to the tip. I found that the original length that I used for the prototype of 36mm was marginal when the wrapping holding the tongue on was covering the first 10/12mm and these reeds needed a small weight. I lengthened the bodies by 9mm making them 45mm long and these reeds didn't need any weight.
One important result of this exercise is the collection of real comparative data that should enable me to optimise the design and the setting up of chanter and drone reeds. So far this work has focused on reeds for the School Pipe Project but I am learning a lot about reeds that I would be unable to learn by the traditional "poke and hope" methods.
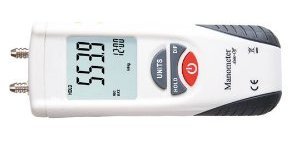
I have only just finished getting the rig to work properly and making it easy to work with. The method of working is to fit a reed into the socket, fit the reed chamber and turn on the pressure from the high pressure reservoir. At this stage the reed will not sound as the flow restriction of a non-vibrating reed is less than the restriction of the reed once it is sounding. In the early stages of developing the rig I didn't have either the low pressure reservoir nor the pressure relief valve and managed to expel the water from my manometer at high speed up to the ceiling!! as when I opened the needle valve the air would flow and at the point where the reed started to vibrate the extra restriction of the reed rapidly increased the pressure, blew the reed shut and emptied the manometer. Now I have the pressure relief valve this can't happen but there is still the need to artificially reduce the flow till the pressure reaches a point where the reed sounds. I do this by placing a finger over the end of the sounding tube and watching the manometer until the pressure reaches a point where the reed starts to vibrate. Using this method I can also check the pressure that the reed starts to sound at.
I have done some work on F chanter reeds and am getting closer to an understanding of the parameters that produce good working reeds in my own chanters (14/09/2011)
Regarding the G chanter reeds all of the good working ones have a blade length (bridle to tip) of between 20mm and 22mm
Click the picture to watch the video
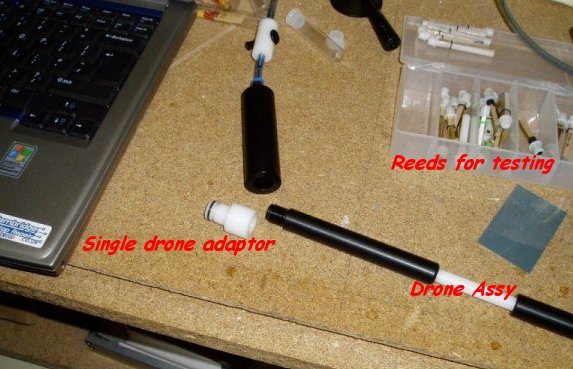
Drone Reeds
I have now set up some 45 drone reeds using the testing rig and it has proved extremely useful. The reeds I have been making are for the School pipes and I am attempting to address one of the problems with the roll out of these pipes and that is the non-availability of reliable replacement reeds.
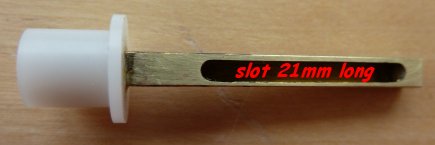
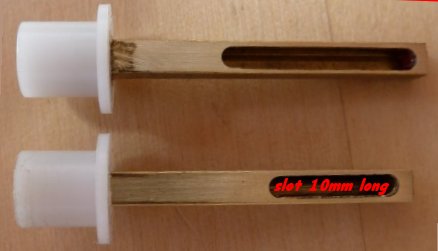
One of the things that I tested was the length of the slot needed in the reed body. I made a number of reed bodies with different length slots and found that a short slot had no impact on the tone or volume and seemed to make the setting up of the reed easier possibly as there is less chance for the tongue to leak around the sides.
Another finding was that holding the tongue on be wrapping with either thread or sticky tape worked but a better solution was the use of a small dot of superglue at the root of the tongue. Holding the tongue this way seemed to have no problems providing the glue only held the tongue for the maximum of 5mm and it was very easy to fit the tongue this way. It was also easy to remove the tongue and tweak its curve and reglue it if it had been over opened.
The machined acetal bodies of the school pipes original drone reeds don't glue very well but a combination of a drop of superglue and a 2 layer wrapping of 1/4" wide sellotape seems to work well.
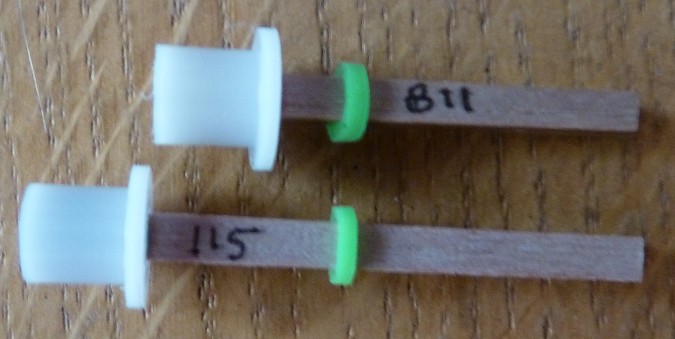
I found that, providing the glued area was only approx 5mm long, the original body length of 36mm was just about OK but I would increase the length slightly to 40mm to allow a bit more adjustment of the bridle.
Back to Introduction page
Back to Index page
© Mike Nelson. All rights reserved.
This manual has been put together by Mike Nelson for his own amusement :)
Go back to Mike Nelsons Home Page
© 1997 Mike Nelson