 |
Making the keys for the chanter
(updated 15/06/10) |
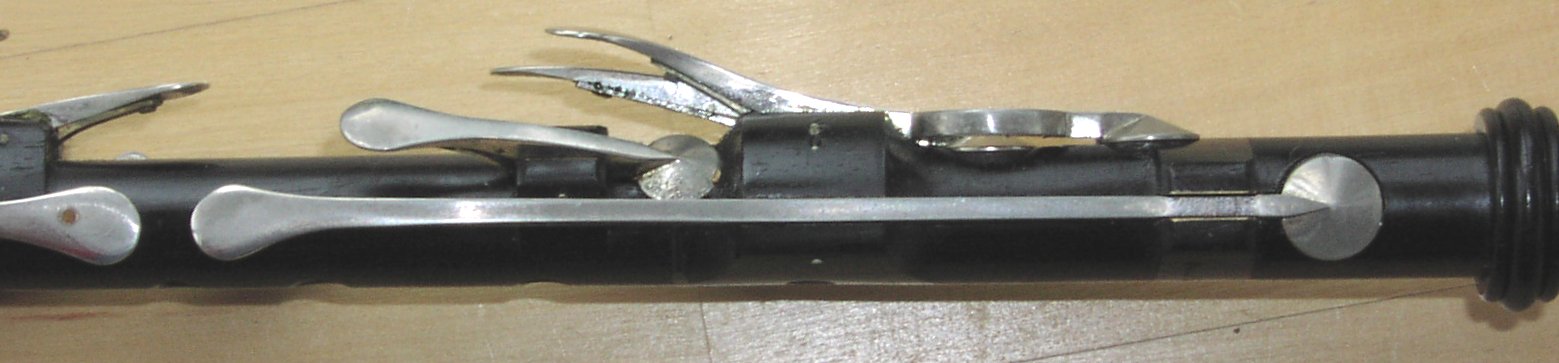
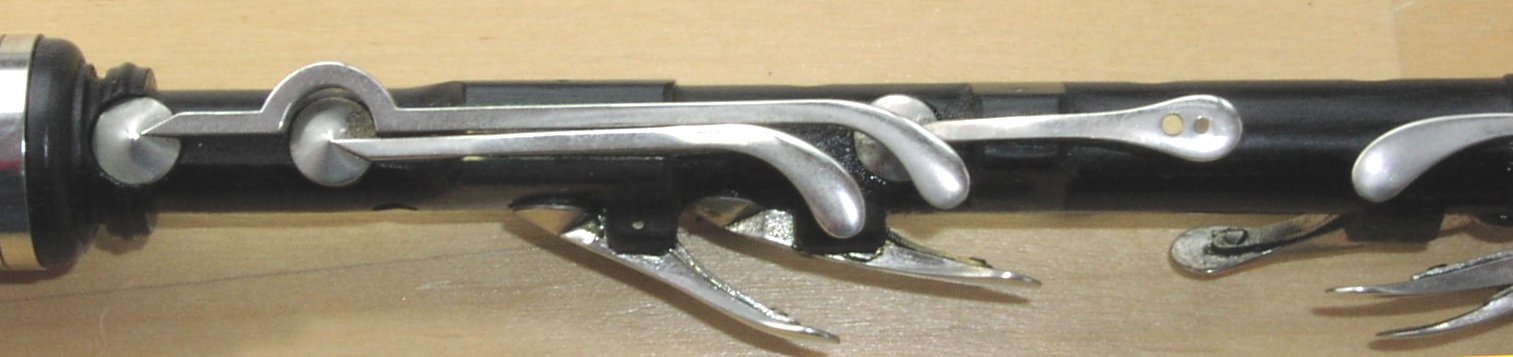
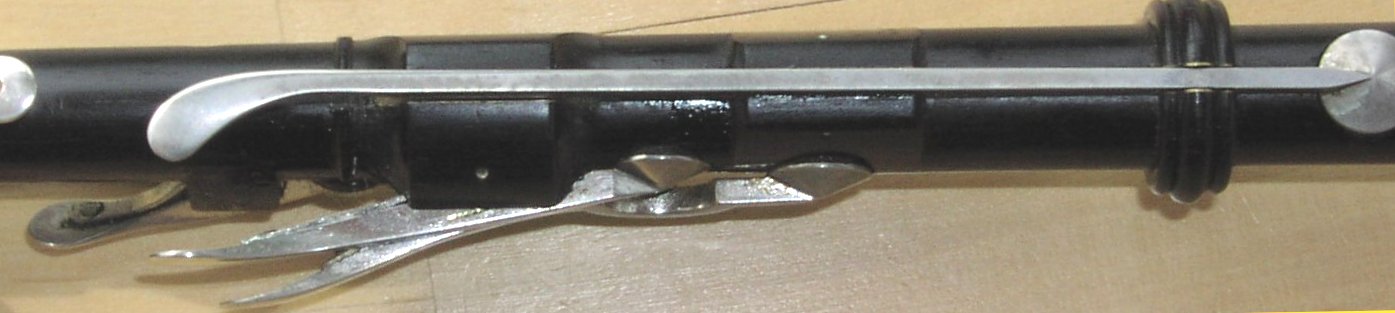
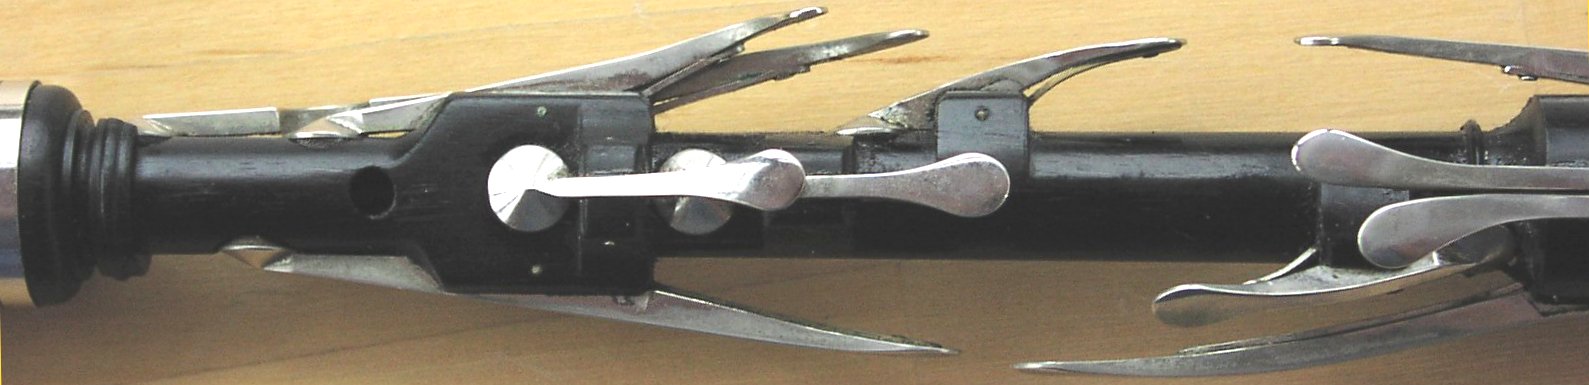
These pictures are of the 11 keyed "F" chanter played by Kathryn Tickell.

Top of the chanter looking onto the finger holes |
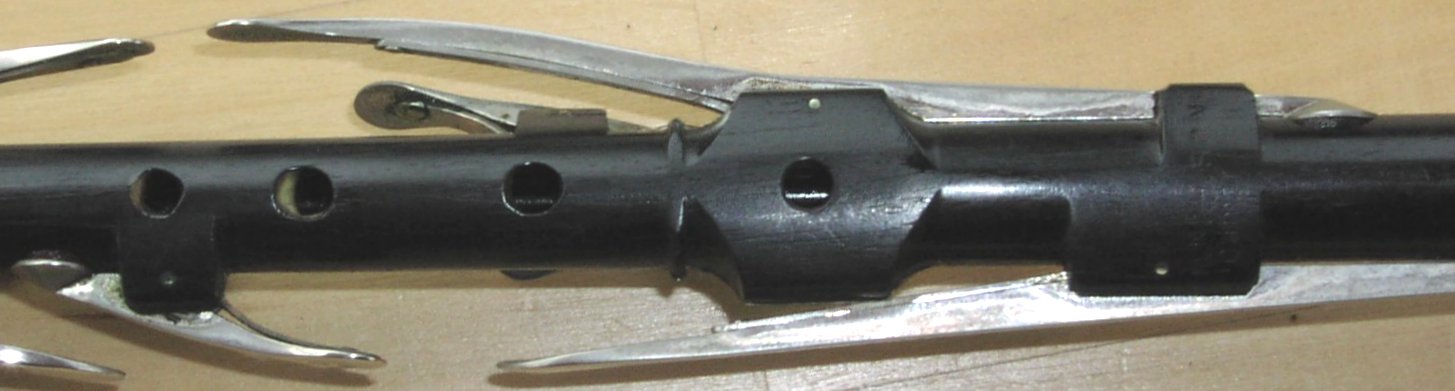
Bottom of the chanter looking onto the finger holes |
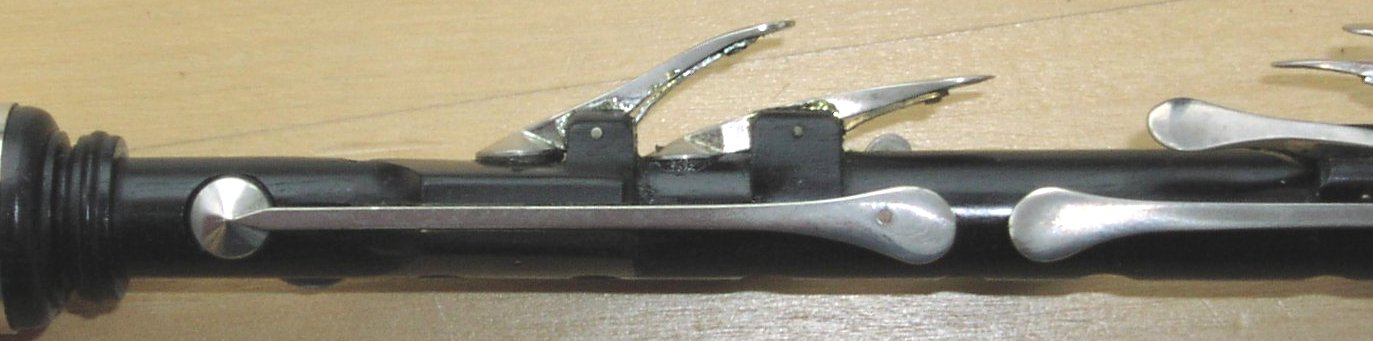
Top of the chanter looking from the left side |
Bottom of the chanter looking from the left side |
Top of the chanter looking from the right side |
Bottom of the chanter looking from the right side |
Top of the chanter looking from the bottom |
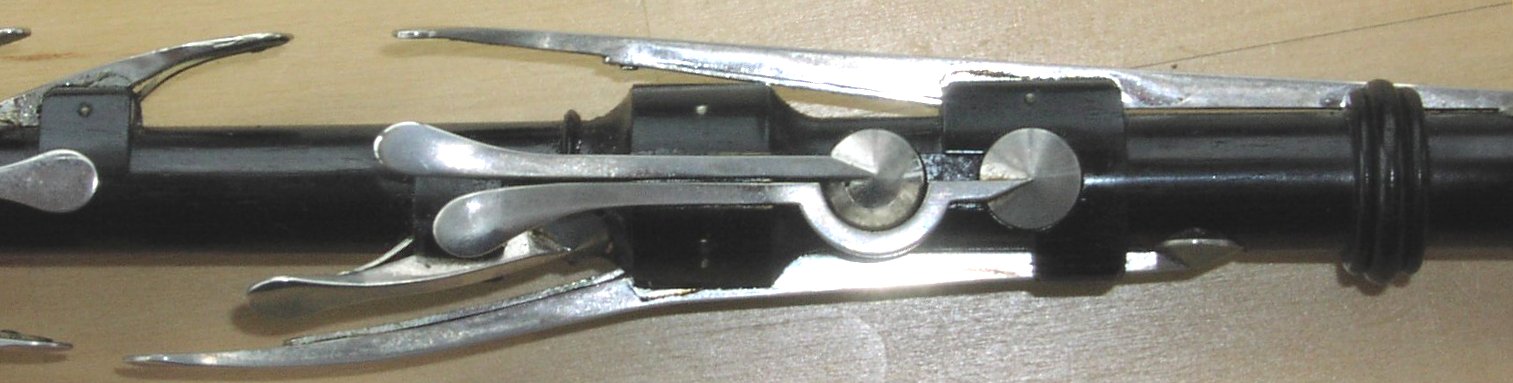
Bottom of the chanter looking from the bottom |
Go Here to see a set of pictures of Kathryn's 16 key F chanter.
keymaking
The single keys are made in four parts.
A turned pad either Ř8mm(5/16") for the upper keys or Ř9.5mm(3/8") for the lower keys.
A strip of drawn brass 3/16" x 3/32" for the shank of the key.
A spring beaten from Ř3mm (1/8") drawn brass rod.
A rivet cut from Ř1mm drawn brass wire.
The material could also be Nickel Silver (also known as German Silver) instead of Brass.
Nickel Silver keeps its polish longer and is often used if a set is not to be plated.
 The pad end of the key is turned from Ř9.5mm(3/8") rod for the larger keys (mainly those that point downwards) and Ř8mm (5/16") rod for the smaller keys (mainly those that point upwards).
Forming the key shank
The main part of the key is beaten and filed from 3/16" x 3/32" section drawn strip.
 Soften about 12mm (1/2")" at the end of the strip by heating red hot and allow to cool.
Using a smooth faced anvil hold the strip on edge and start to flatten the end. The work will need to be softened at least once during the process.  I start the flattening using the main part of the hammer and, after softening, I continue working the end using the ball end of the hammer until it is wide enough for the final shape of the touch piece to be filed.
Be prepared to cut off the end and start again if things go wrong. It takes some practice to achieve a good forged end. Do keep the work annealed as, if the piece is worked too much between annealings the material will crack. This is especially true in the case of Nickel Silver.
Shaping the key shank
File the touch piece of the key to your chosen shape. Take care to get the shape as precise as possible as clumsy keys are ugly to look at as well as hard to play. Avoid making the chanter look too heavy.
After shaping the touch piece of the key offer the key up to the chanter over its slot and mark the position of the center of the pad seat.
 Cut the key blank to length plus at least 1.5mm (1/16"). File the thickness of the key down from 3/32" to 2mm. This dimension must be a good fit in the lined slot in the chanter. The filing of the key to the correct thickness is a time consuming chore and is only necessary because I have not found a source of 2mm wide drawn brass rod. This may now be available but I am still using existing stock.
Fitting the pad
File the key to approximately the correct side profile and finish off the shaping of the touch end.
 Place the turned key end, with a dummy pad under it, over the hole in the chanter, and fit the key to it by filing the end until no obvious gap is visible.
  File end to a point in plan view as shown.
Remove both parts from the chanter and set them up on a fire brick and silver-solder the joint using Easy-flo solder, not soft solder, together with Easy-flo flux.
To ensure a good joint, both parts must be clean and care must be taken to apply only enough silver solder to fill the joint. (This can be simplified by flattening the end of the silver solder rod or by obtaining silver solder wire of about 1/2mm diameter). After cooling, clean off any excess flux and file away any solder fillet to give a neat, square, joint.
Re-fit the key to the chanter and mark lightly the pivot position, using a 1mm drill held in a pin vice. Drill the pivot hole 1.1mm diameter and refit the key to the chanter checking that the pad end of the key does not foul the sides of its counter bore.
Springing the key
 Drill the hole for the spring rivet, 1mm diameter, as close as possible to the touch end of the key (but not in the beaten part unless the key is one of the short keys) and counter sink lightly from the underside of the key.
The spring is made from 2mm diameter drawn brass rod, hammered flat without annealing, until it is between 0.5mm. and 0.75mm thick, and very hard and springy. From this the springs are cut just under 2mm wide and of length suitable for the key. A hole 1mm diameter is drilled in the centre of the width, about 3mm from one end, and lightly countersunk both sides. The spring should now be shaped as shown in the drawings.
 The rivet is cut from 1mm diameter brass wire and silver soldered into the hole drilled for it in the key taking care that the fillet of silver solder only just fills the countersink (if too large a fillet is made the spring won't seat properly). Place the spring onto the rivet and check that it will still fit the chanter.
Clip the rivet to length (about 1mm. protruding above the spring.), and, using the ball end of a ballpein hammer, spread the end of the rivet to a mushroom shape. Don't flatten the rivet too much or it will be weak. File the rivet flush with the outside of the key. Smooth and polish the key.
Finally, fit the key to the chanter and check the action of the spring. As a guide, the end of the spring should touch about 2mm. behind the pivot on the long keys and 1mm on the short keys to give a light smooth action. If the spring is too far from the pivot the key will be heavy to open, and if too close, the key will not seal reliably.
Double Key Making.
There are two differences in the making of double keys. Firstly the shaft of the key is offset, and secondly the longer key must have a recess along its length to clear the pad of the shorter key.
 On the longest key a piece of 3/16" x 1/8" nickel silver strip about 15mm. long is silver soldered in the approximate position of the shorter key pad.
 When each key has been individually fitted to its slot, and its pivot hole marked and drilled, the two keys are put together on a single pin and the cutout marked as shown to allow a small clearance on the pad of the shorter key .
The recess is then filed to the scribed line and the outside shaped as shown, to give the key an even cross section 2mm. wide.
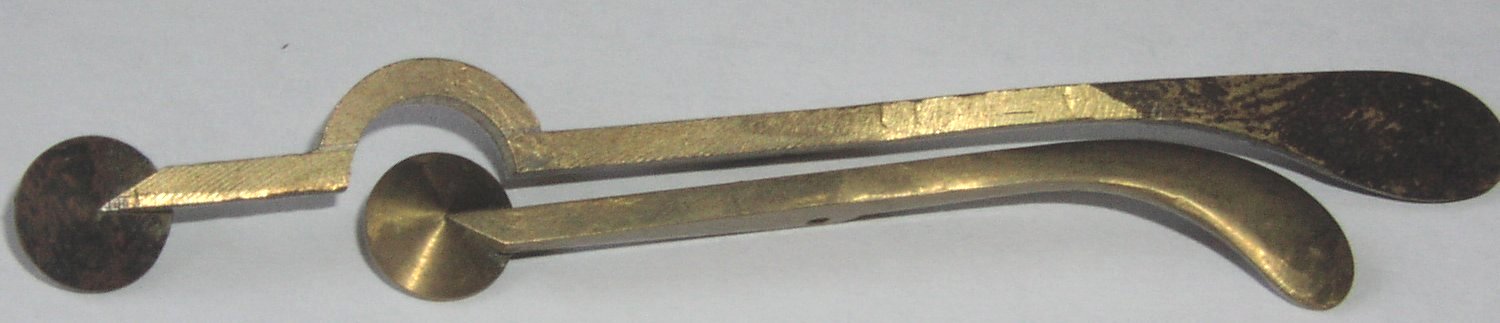
Tools to Assist in the Filing

Filling Jig Parts |
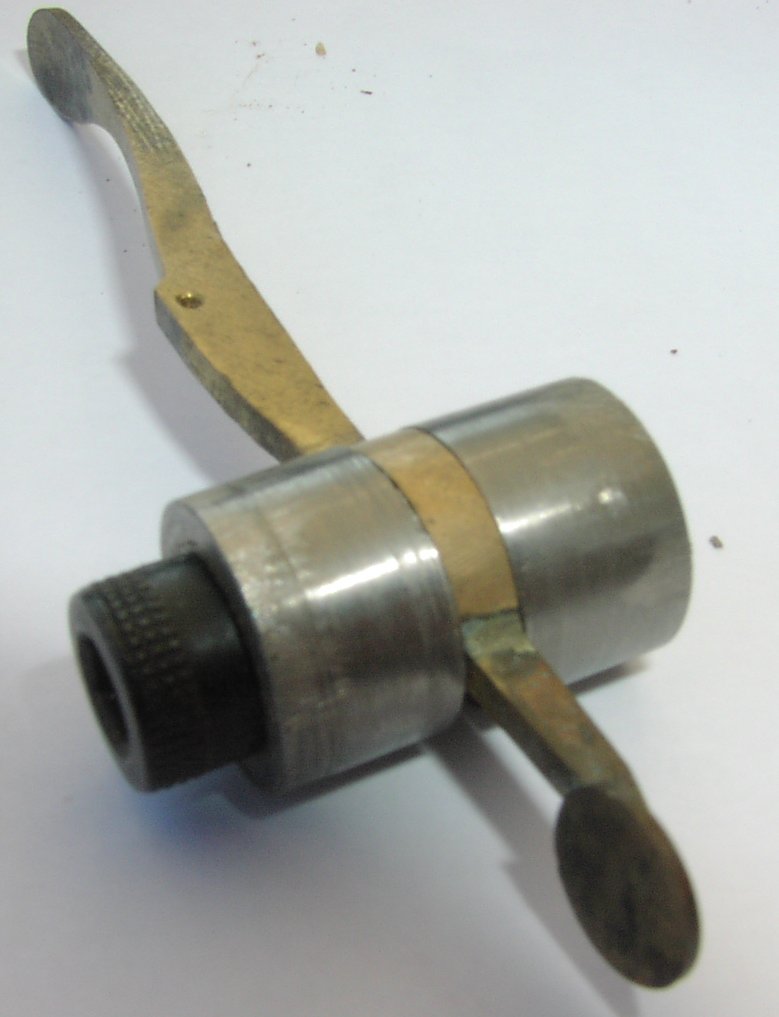
Filing jig Fitted top view |
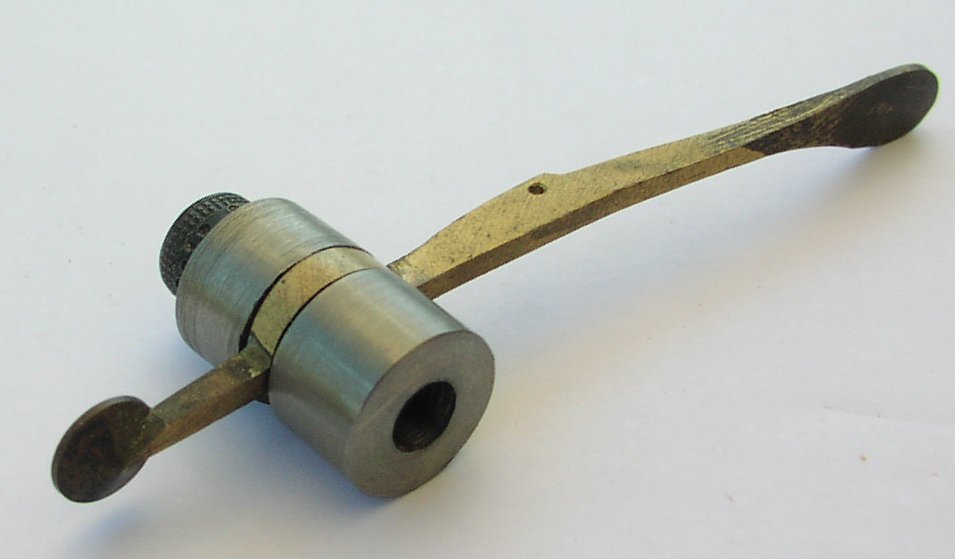
Filing jig fitted bottom view |
Key filing jig for lower keys |
NOTE:
The 3/16"x3/32" 15mm. long strip can be silver-soldered at the same time as the shaft to key pad joint is done to avoid the chance of softening one joint whilst doing the other.
The remaining work on the key, springing and polishing , is exactly the same as the procedure described for the single keys.
Adjusting and padding
In order to get the best possible performance from a chanter, the key pads must be airtight when lightly oiled. Leaks can be caused by a number of faults.
1) Key head at wrong angle.
The head of the key to which the pad is glued must be square with the pad seat cut in the chanter. If this is not the case, the head must be adjusted using a small pair of pliers. Protect the jaws of the pliers with masking tape, to avoid marking the key, then fit a new pad.
2) Key seat badly cut or damaged.
This is difficult to remedy and care should be taken to get the seat right when it is first cut. If however, you do have a damaged seat to repair a good job can be done by mixing ground charcoal with 24 hour epoxy (Araldite) and filling the damage with the mixture and, once hardened, recutting the seat.
3) Key badly fitted to the slot (too loose).
This can cause the pad to sit in random positions and, whilst this makes little difference on a conical seat, it can cause severe leaks with the more common flat cut seat. A partial cure can be effected by using shims cut from thin brass or plastic, fitted into the key slot beside the key, and held in place by the pivot pin. I would recommend gluing these shims in place as they are hard to get back if the key has to be removed for any reason.
NOTE:
A small amount of side-play is needed to ensure that the key does not bind, but this should not exceed 0.5mm, measured at the tip of the key for a short key or 1mm for a long key. Any more than this is too much.
Back to Introduction page
Back to Index page
© Mike Nelson. All rights reserved.
This manual has been put together by Mike Nelson for his own amusement :)
Go back to Mike Nelsons Home Page
This site is created and maintained by Mike Nelson for his own pleasure
© 1997 Mike Nelson