First a bit about me. I have worked as an engineering Designer for 45 years, for the last 30 of which I have used Computer Aided Design tools to do my job. The first computer based version of this book was started on an Apple Mac around 1984. The original 1980 hand drawings were redrawn using a 2D CAD program called Medusa - one of the first and still the best 2D CAD programs that I have used.
The latest versions of the drawings are being created on a PC using SolidWorks and for this the parts are all being realised in 3D before the 2D drawings are created from the 3D parts.
Having the parts all modeled makes it possible to look more closely at them, spin then around, zoom in to parts of the model, assemble the parts and check for errors, explode the assemblies and many other opportunities. I have put a link below to a viewer for these files. This viewer, called Edrawings®, is a professional tool that is free and simple to use (much like the Adobe Acrobat Viewer) and comes complete with well written help files.
If you are not used to using CAD tools like this, I have tried to write a simplified explanation of what the tools will do for you and a beginners guide to getting stuff to work.
If you have used CAD before then skip this bit!
- Download the Edrawing installation software. you will want the "eDrawings Viewer only" so click that button and then the download button. You will be shown the "Export Eligibility Requirements" It is worth a read if only for a laugh at the naivety of it. Agree to it and click the "accept and continue button at the bottom of the page. it will ask you where to put it - I would suggest that you put it on the desktop.
- Now you have the edrawingsenglish.exe file on the desktop. double click it and follow the installation instructions
- Run the application - you should have an icon somewhere, probably on the desktop.
- read the help file!!
- I would suggest that you download the model files below by right clicking on the one selected and chosing the "save link as" option.
- open the model files with the Edrawings viewer by selecting the "File Open" option and then have a play with file
- you should be able to zoom in to any area, spin the model around, section the model to look inside, explode assemblies (if I have set the model up to do this) and many other useful functions.
Click here to go to the download area for the PC version of Edrawings
Click here to go to the download area for the MAC version of Edrawings
Click here to go to the download area for Acrobat Reader You will need this program to read the drawings.
Be careful to untick any of the extra stuff that this site wants to foist on you
Here are the files that you can view using the Edrawings viewer
You will have a more useful tool if you download the files before you use them by right clicking the link below and selecting the "save link as" entry to get the actual file. If you are not using Internet Explorer you will need to do it this way because the file type won't be recognised and just clicking the entry will fill the screen with weird text!
Internet Explorer has a viewer that will give you a good model that you can rotate
|
I recommend that you download the file into a folder and then open it with the Edrawings application that you have downloaded and installed you should see this picture (I am assuming that you will start with the chanter):-
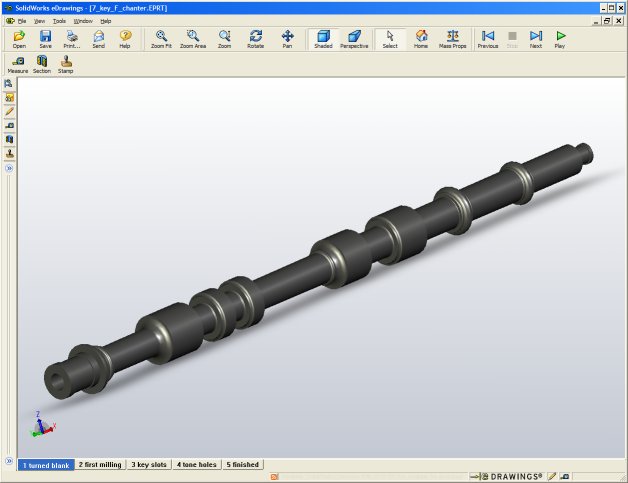 Notice the tabs along the bottom of the image. By selecting the appropriate tabs you can view the different stages of the machining of the chanter. You will be able to spin the model around and zoom in to any part of it.
 |
I have modelled the Burleigh drone assembly and this may be useful to anyone who is planning to make a set from the materials supplied by the Northumbrian Piping Society. The file is an Edrawing as described above and I also note that a verson of the Edrawings software is available for the Ipad.
Burleigh drone assembly
Back to Introduction page
Back to Index page
© Mike Nelson. All rights reserved.
This manual has been put together by Mike Nelson for his own amusement :)
Go back to Mike Nelsons Home Page
