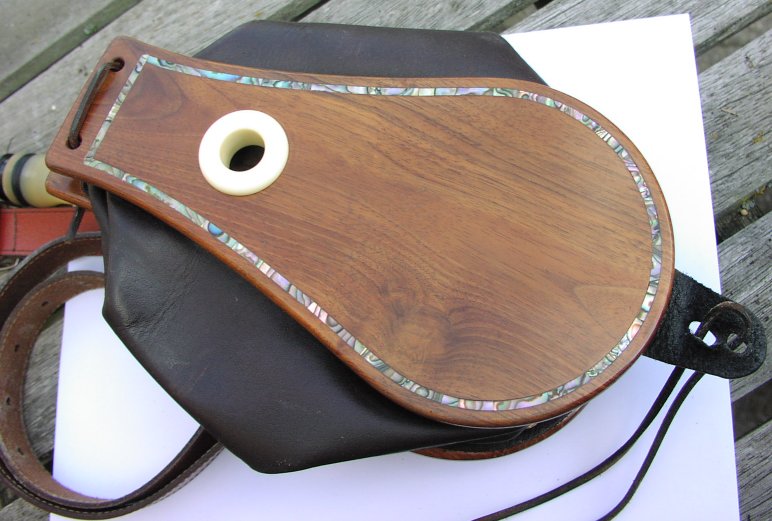
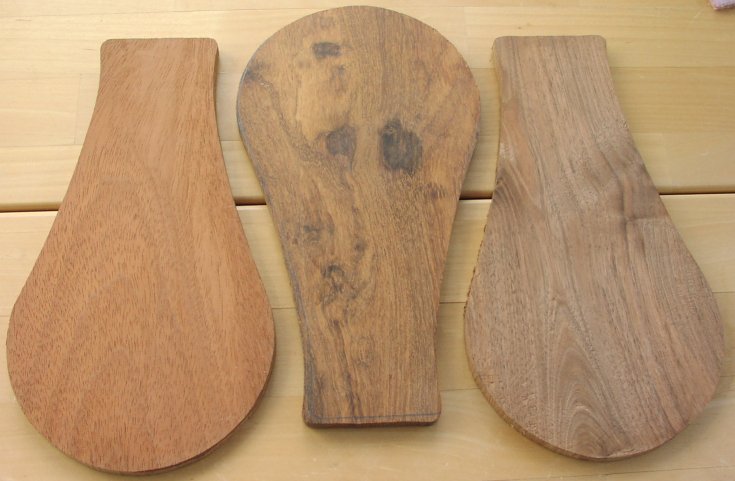
I make the plates from a number of types of wood. My favourite is walnut and I look for planks with the prettiest figuring. I have made excellent bellows from Hondurous mahogany and Indian rosewood. I don't veneer the plates as, although this can look really nice, I have seen quite a number where the veneer has lifted. I also don't make the curved bellows. I have tried them and they do work well but I guess that I am just too happy with the working and feel of the flat plate design.
I make the plate from 8mm thick (5/16") wood planed it as smooth as I can get it. It is worth inspecting it carefully at this stage to check for cracks or other faults. Very pretty wood can have all sorts of checks and faults but these can be repaired at this stage without compromising the working of the finished bellows.
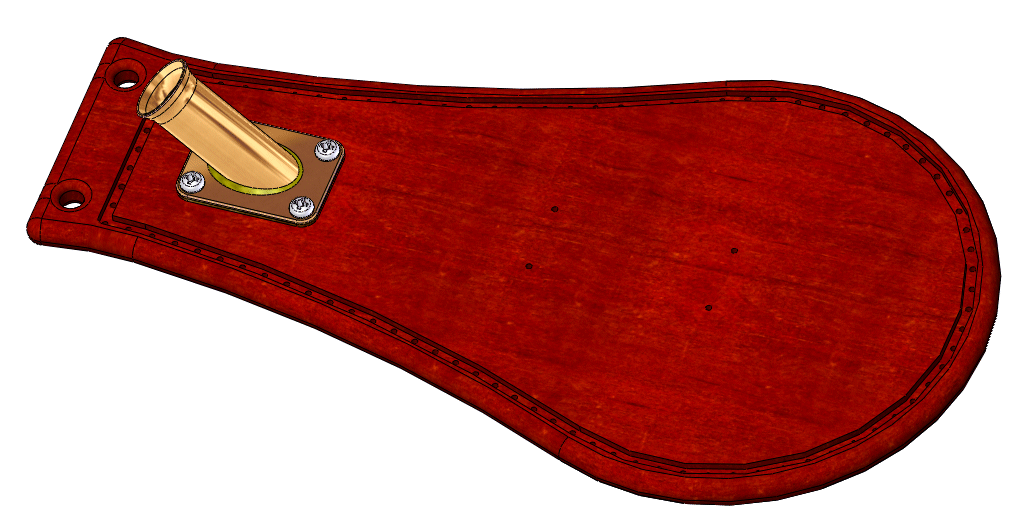
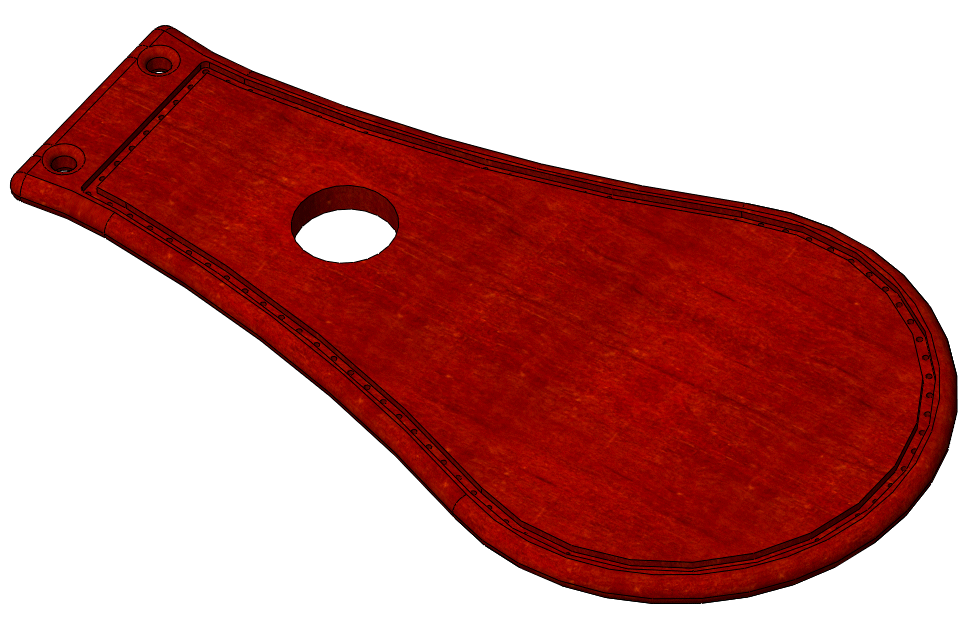
The plates are cut to the shape shown on the drawing (feel free to modify the shape to suit your own artistic vision) and the edges carefully filed until the shape is even with no lumps or hollows.
The groove for the stitching around the outside can be cut by hand but a much better job will be achieved if a router is used. I use a Dremel router for this type of work. I use the Ř3mm router cutter available from Dremel. These used to be hard to find but I have found that they are now easily obtained via the web. I also use the vee router cutter to cut a "vee" groove on the back of the plate with the router using the same setting as the stitching groove. This serves a double function. First it marks the centre for drilling the stitching holes and second it gives the leather something to pull down into, I'm not sure whether it helps the sealing because I've never done a set without it, but I've never had a leak in the stitching!.
I mark the positions of the stitching holes by stepping round the groove with a pair of dividers to get the spacing of the stitches even, and the start and finish points where I want them. Drill the stitching holes Ř1.5mm (1/16") through the plate. I always go round the holes after drilling and smooth away any burrs to give the stitching an easier life. I also drill the holes mounting
The edges of the plates should be well rounded as this adds significantly to the comfort of the player. I use a rounding cutter with a 4mm radius to give a full round that only needs the minimum of cleaning up.
The Ř20mm (1") hole in the top plate should be cut with care to ensure that the hole is round and smooth. I do this by clamping a couple of pieces of scrap wood, one each side of the plate. I then use a Ř25mm Forstner bit as these cut a very smooth hole.
The bellows outlet hole in the inner plate can be cut by using the outlet tube assy to guide the drill. I clamp a piece of scrap wood to the back and, with the 1/2" drill held on the chuck of the lathe and the plate assy held by hand. Feed the drill into the tube and gently through the wood. You should now have a hole that lines up well with the outlet tube.
Finishing
I have used a number of different finishes for the plates. The requirement is for a transparent, durable, easy to apply, transparent finish that will survive the demanding under arm environment.
Most of the finishes that I have used are now either banned by the health police or emasculated to the point of uselessness. One finish that is still available and very durable is Sadolins PV67 I have used this (but not for bellows) and I will use it on my next set of bellows. You should get the plates fully finished before any leather stitching is started as it is impossible to do a good job after.
Stitching the leather
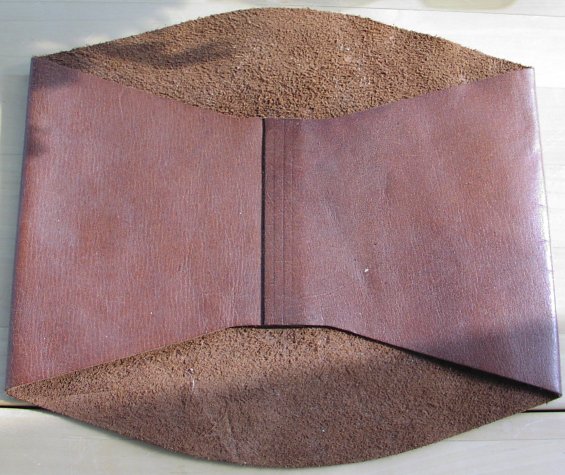
Bellows Leather ready to stitch.
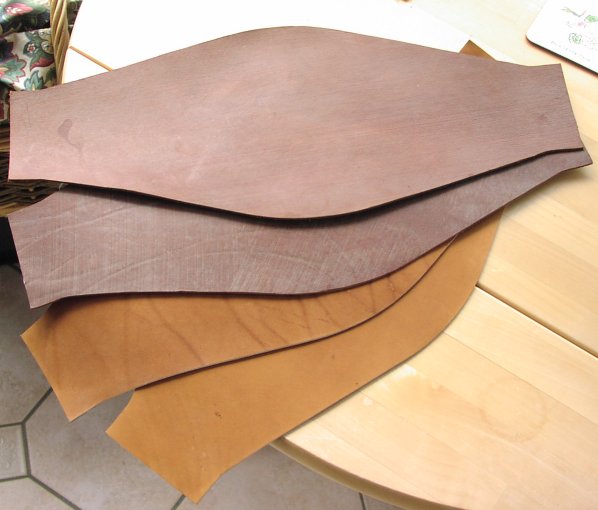
Bellows Leather cut to shape.
TBD
Making the bellows outlet tube assy
TBD Fitting the Belt
TBD