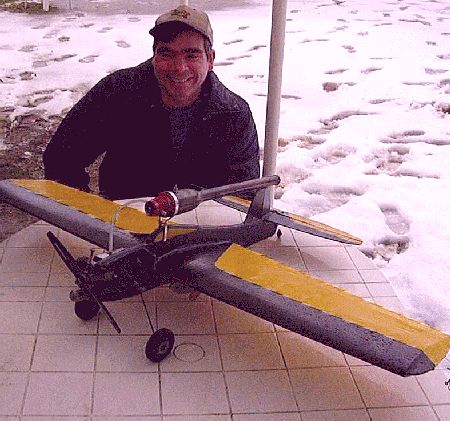
Dynajet powered Stunt
Dynajet powered Stunt |
|
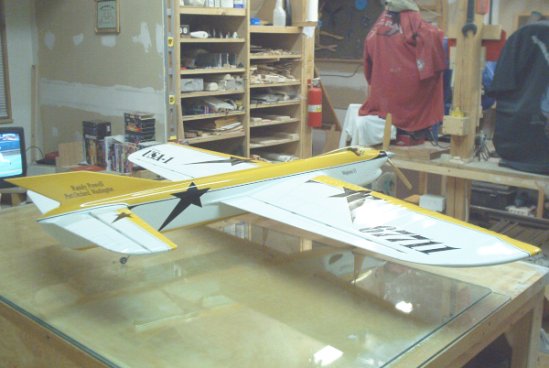
| Young Daniel regularly completes the whole pattern flying 2.2 second laps with his Dyna/Ring (56' lines, eye to eye). He reports that there is no "whip-up" whatsoever, either.
|
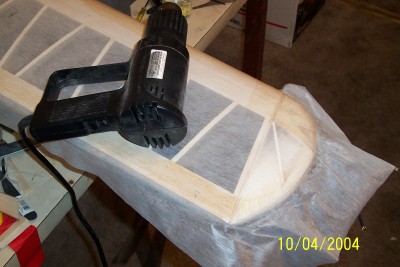
After messing up many airframe parts with “fuzzies,” I finally figured out how to use poly-tissue. I have been using a slightly thicker material called Dacmat. It weighs 35 grams/sq. metre, as opposed to Polyspan, that weighs 25 grams/sq. metre. Everyone told me to use it with the shiny side up. Sometimes it works, and sometimes it comes up with bad fuzzies. Maybe I’m just getting old, but I always battle to see which side is the right side. I took an old bust wing, and covered two sections. One with the shiny side up, and one with the dull side up. I used the same technique on each section of carefully putting it on with clear dope around the edges, and then shrinking it carefully with a heat gun. Using an iron directly on the surface, seemed to make things worse. Both surfaces received one careful coat of clear dope with a very soft brush. I could not see much of a difference after the clear dried, so I took a section of each piece, and rubbed it hard with a paper towel and some clear dope. The piece with the shiny side came up immediately with fuzzies, and the other piece stayed fine. I then covered the stab of my new stunt ship once again, with the dull side up. I even used the iron to shrink it, without being very careful, and then I “sloshed” some clear dope on, brushing it out in all directions. No problems at all!
A quick way to check if you have the right side, is to take a corner of the tissue and rub it with a paper towel, and some clear dope on it. If it stays fine, then you have the right side. I then tried actual Polyspan, and found that the shiny side is the right side, but that it’s more sensitive to abuse than the Dacmat. The good thing about all of this stuff is that it comes off quite easily if you need to fix it. You can use a little thinners if it sticks too well. I hope that this helps anyone battling with poly-tissue.
I've had good luck using a heat gun to shrink polyspan and then using 50/50 thinned dope, which I slide on with a fully laden brush and let expand out over the surface. Takes several coats before I even consider sanding and even then a light touch is all you need. I believe you need to do the sanding on the airframe before you apply the polyspan and very little after until you have build up a gloss coat of clear on the materal. Even then, a fine grit and a light touch is preferred. I used polyspan from Model Research Labs. Used it thus far on an Orbit Ace, Jetco Dolphin and a Brodak Nobler. Shiny side up, very careful to lay it on the wing flat, (Silkspan the wingtips first.) nail it down with very thinned dope to activate dope on the structure and make sure it is good and secure around the edges. Then use the heat gun to shrink it tight and from there flowbrush on several layers of thinned dope. (Don't sand until filled and then only very very lightly) I think the secret is to get it in flat to begin with and then use plenty of heat to tighten it up. The result is tight as a drum and very strong. Cy.
Dyeing Polyspan Polyspan can be dyed with dye from Fabrics to dye for. Dye-na-flow by Jacquard do several colors and not all of them work well. So far I have tried the red, yellow , and black. The black came out gray but the others worked fairly well. It is a heat set dye. I used nitrate clear dope for the first coat then Sig Litecoat clear before painting the trim with Sig Butyrate. |

| I was told that Poly-Span would not go around corners very well and for the most part it doesn't. Till now! I was doing my thunderbolt wing and was already to silkspan the wing tips. I decided to try a X-Kote trick to see if it would do the tips and it did. Wow am I glad.
Here's how you do it. Dope from the center out. Then work on the tip. You have to look at it to get the lay of the land so to speak. Once you have decided how it will work best start doping.Pulling it tight. I have a insdustial heat gun. Don your gloves (I don't cause I'm use to it) And just before the dope is dry heat and pull just like X-Kote. Works great. I will post some picks when I get the other half of the wing done. Robert Storick I have never had any trouble with Poly span and corners but the sags will kill your sole. No matter how tight I'll pull it it will sag. A good way to beat the Fuzzy's, use CA on when you have sanded through. Mike Clark |
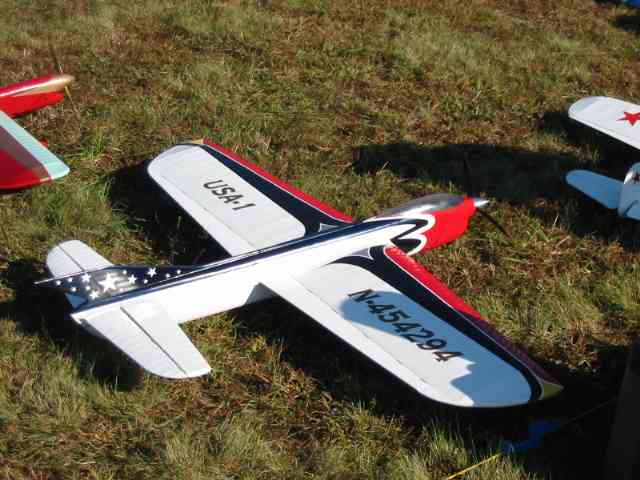
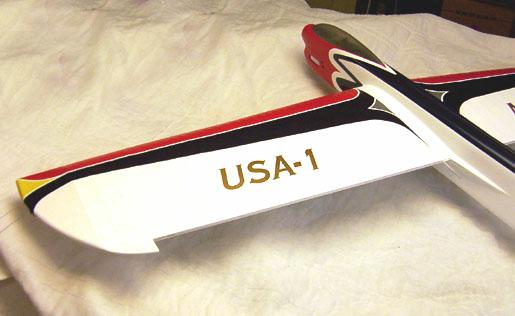
| USA-1 pictures |
 |
 |
 |
| Bill Little's USA-1 | Bill Little's USA-1 | Randy Powel's USA-1 |
How to "Shrink Form Your Canopies" was worked up as a simple way of making canopies for scratch-builders. It utilizes the plastic in 2 liter pop bottles, either clear or green tinted. With essentially free material and your hot air gun, you are ready to try it. It works well for canopies up to about 8-1/2" long and with the Alternate Method up to 11-1/2" long. That seems to the practical limit, as an opened up and rolled out 2 liter bottle gives a piece of material about 13-1/2" long. They are fuelproof and are not affected by acetone, MEK, or dope thinner. RC-56 cement works good for installation. Currently, I have several in use: an 8-1/2" on a .10 sized "Turbulent City," two 5"x3"x2-1/2" deep units on .40 sized models and an 11-1/2" on a .65 sized sport model. This process works for making engine cowlings also, but that's another story.
The canopy pattern or "plug" can be carved from any clear wood: balsa, pine, cedar, poplar, etc.. For best results, the plug should extend about 1/4" beyond the edges of the desired canopy. Final sanding of the plug should be with 220 grit paper. Do not paint.
(1) Mark a trim line and center tics on the plug with a felt tip permanent marker. Remove the label and cut both ends from the 2 liter pop bottle.
(2) Slip the plug and a scrap block of wood into the bottle, positioning the plug in the center of the bottle. Wedge a small block between the plug and block of wood to make a snug fit.
(3) Start shrinking the bottle around large bottom block first. Keep the gun moving. Next shrink the sides, then around the plug at the ends. Avoid too much heat at the very ends or they may curl up.
(4) When almost shaped, go over the whole surface carefully to get the last ripples out.
(5) Trace trim line and center tics on the plastic with a felt marker. Marks can be cleaned off later with acetone or thinner.
(6) Cut canopy along the trim line. After final fitting and cleaning, attach with RC-56.
Alternate Method for Canopies Up To 11-1/2" Long.
(7) Cut ends from bottle as before. Split down one side. Pull Sheet snug from front to back over the plug, placing tacks at each end beyond the trim line. Then pull down at the sides and tack or nail in place. Tacks or small nails about 2" long and can be used and need not be driven all the way in. There will be large "billows" along the sides, but they will shrink up.
(8) Apply heat to the large wrinkles first, alternating sides as you work from the center towards the ends. Finally, go over the entire surface carefully until it is smooth. Trace the trim lines and center tics before cutting out the canopy. Tom McClain
For really free hinges, it's most important to get the alignment correct. Whatever method you use to create the hinge slots, please take the time to center them. Make sure they are all in line and true.
Kieth Varley has outlined how to prepare the hinges with Valsoline so the glue cannot wick into the hinge barrels. Take the time to re-read his post.
While most people use epoxies, or some other standard type of glue, the method I'm outlining uses thin Ca. I like the speed and ease I get by using Ca, but before learning tis method, I never trusted Ca for hinges.
You may doubt the stregnth, but prove it to yourself. I've never had one fail since I learned this method.
The key is to use an interface, something to help the Ca wick deeply into the slot, and help grab and hold the hinge. The interface of choice is common ordinary Silkspan. Other tissues may work, but since there's always some scrap pieces laying around the shop.......
Cut a strip of silkspan abpout the same width as the hinge. Cut the strip into legnths that are about 1/4 to 1/2 inches longer than the hinge tab times 2.
Fold these small strips in half.
We'll install the hinges in the movable surface first. There's a reason for this, I'll explain in a minute why.
Take one of these folded pieces of silkspan, and slip the hinge tab between the two surfaces of silkspan.
Push the silkspan and hinge tab into the slot. Do the same for all the hinges, but don't glue just yet.
Once all the hinges are basically in place, take a minute to align the barrels.
I promised to explain why we start with the movable surface first. It's so we can align the barrels to help prevent binding later.
You did prepare the hinge barrel relief pockets didn't you. I hope so.
Hold the leading edge of the movable surface agianst a straight solid surface. A door frame works good for this purpose. Put pressure agianst the leading edge. All the barrels should be aligned to the same depth. Those that are too deep should be re-positioned until they all are in line.
Use one of those small ca applicators. The one with the small tube. This allows you to accuratly place the Ca exactly where you want it to go. Place the tip agianst the silkspan that is sticking out of the hinge pocket. You want to be right next to the pocket and the Silkspan. Squeese in some Ca, not too much, but enough to wick deeply into the pocket. Wait a second, and turn the surface over, and do the other side in the same way.
Wait a few minutes, and you're ready to install the surface onto the fixed surface.
It helps to partially start the silkspan with a spare hinge. Just push them in a fraction of an inch.
Carefully insert the hinge tabs that are mounted in the movable surface. Once all are correctly positioned, and started, put some pressure on the trailing edge of the movable surface and seat all the hinges. Take some care to see that all the hinges are seated to the desired depth, and that the gap is what you want.
Push down slightly on the surface. By down, I mean in the direction of travel, and use your Ca applicator to wick some Ca into the top of the hinge tab. wait a minute, turn the plane over, and push down on the surface again, You'll be bending it opposite from before, and again wick some Ca into the hinge slot.
Wait a few minutes. Work the surface a bit to make sure it's free.
Take your exacto knife and cut off the excess Silkspan protruding from the hinges.
You're done. Takes longer to type this than it takes to do it.
Good clean, aligned, and, if you did it right, free moving hinges.
Another great thing about this method is, You can easily install them after you've finished the plane.
Try it on that old plane first if you have any doubts, Or at least make up a test piece first to try the method before you commit it to your new world beater.
John Miller
© 1997/8/9 2000.01.02.03/04 mike.nelson@camcon.co.uk